Find Me!
Green-ish Thumb
  • Blog
  • About
  • Contact

2015 Garden Makeover Update #4

8/1/2015

0 Comments

 
Picture
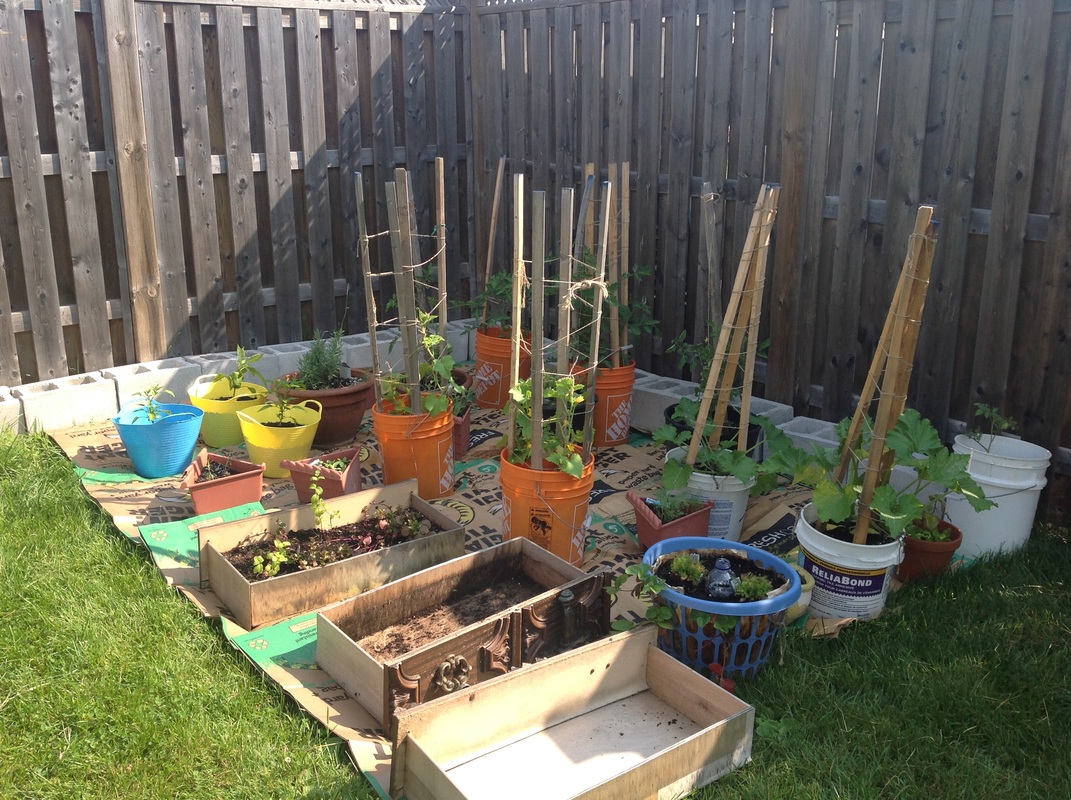
Things are still slowly progressing in my backyard. I got more paper bags down. Getting them down is the easy part. Keeping them in place through windy days is quite another. I had a bit of a pattern set up to help me keep all the corners down, but my containers are too large and the bags are too narrow, so I'm not having a whole lot of fun with this part of the project.
Picture
One other thing that is seriously slowing my progress is that it is definitely difficult to get concrete blocks! Home Depot is the only place I can get them without buying in bulk. Why am I not buying in bulk? A few reasons, actually. First off, I just don't have the cash available to purchase over 100 blocks at almost $4 a piece. Next is getting them to my house. I can't possibly get them all into my car. Delivery would add yet another $50-$75 to my total. So I have to forgo the larger landscaping companies and get them from Home Depot, as they're the only place in my vicinity that carries them (Rona doesn't carry them in this province), and even having said that, there are only select HDs that actually stock them. The one up the street from me doesn't. So for the ones I've used up until now I've had to drive over to the one in Bowmanville and bring them home 5 blocks at a time. Why five? Well, that's what fits in my trunk, and I'm not sure I want to put more than 250 lbs of stuff in my trunk at any one time anyway.
Picture
So that worked for a while, then those were bought up, and after two unsuccessful trips I decided to ask someone when they were getting more. The guy told me they actually had some, but that they were not unloaded yet and would be placed on the floor shortly. Two weeks later they still weren't there. After my fourth unsuccessful visit I figured it was time to start looking elsewhere. So I guess off to Whitby I go.
Picture
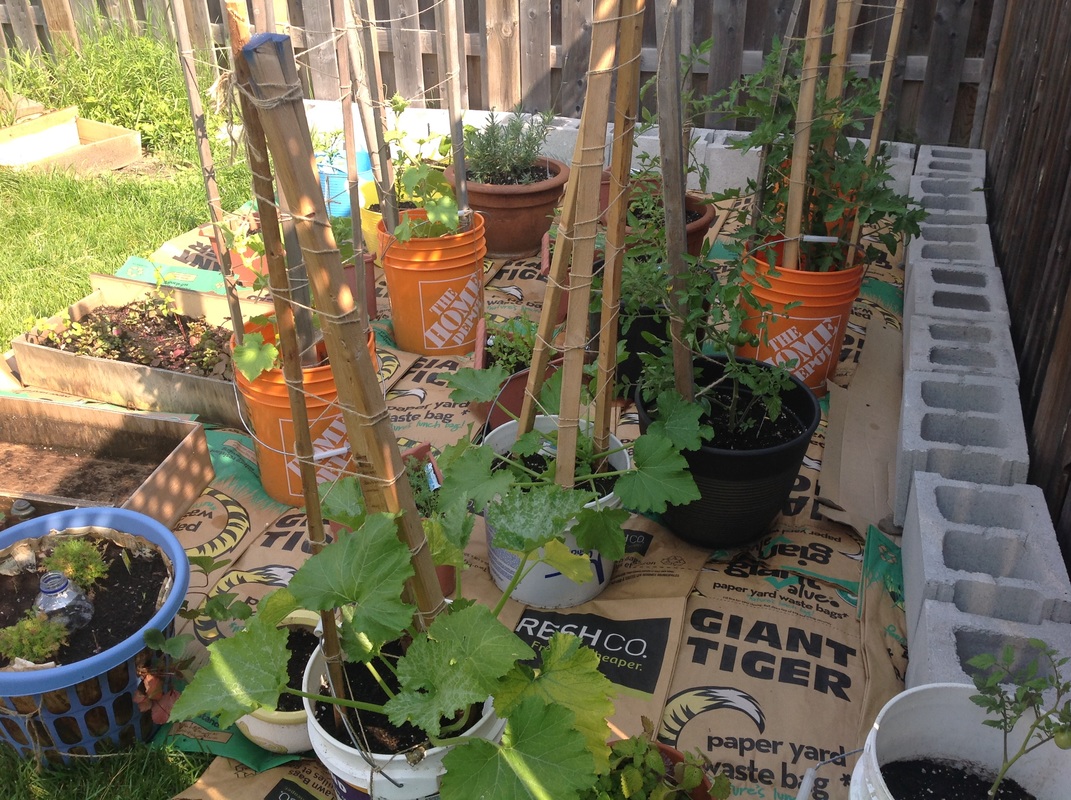
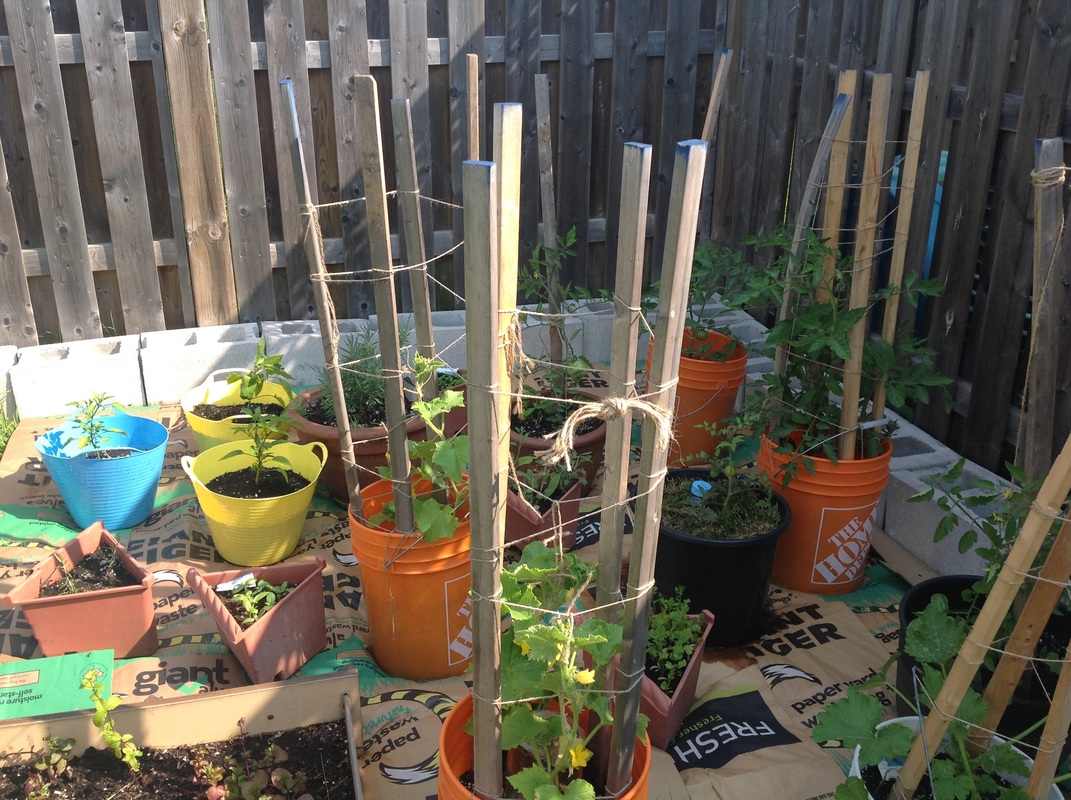
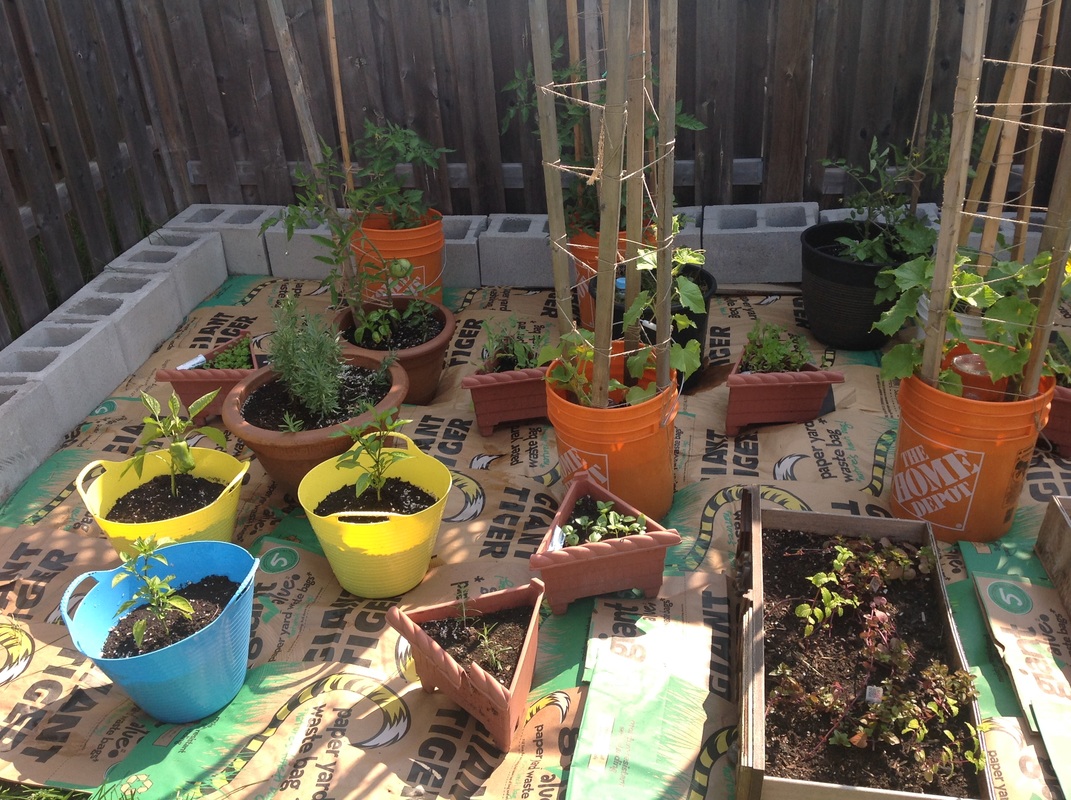
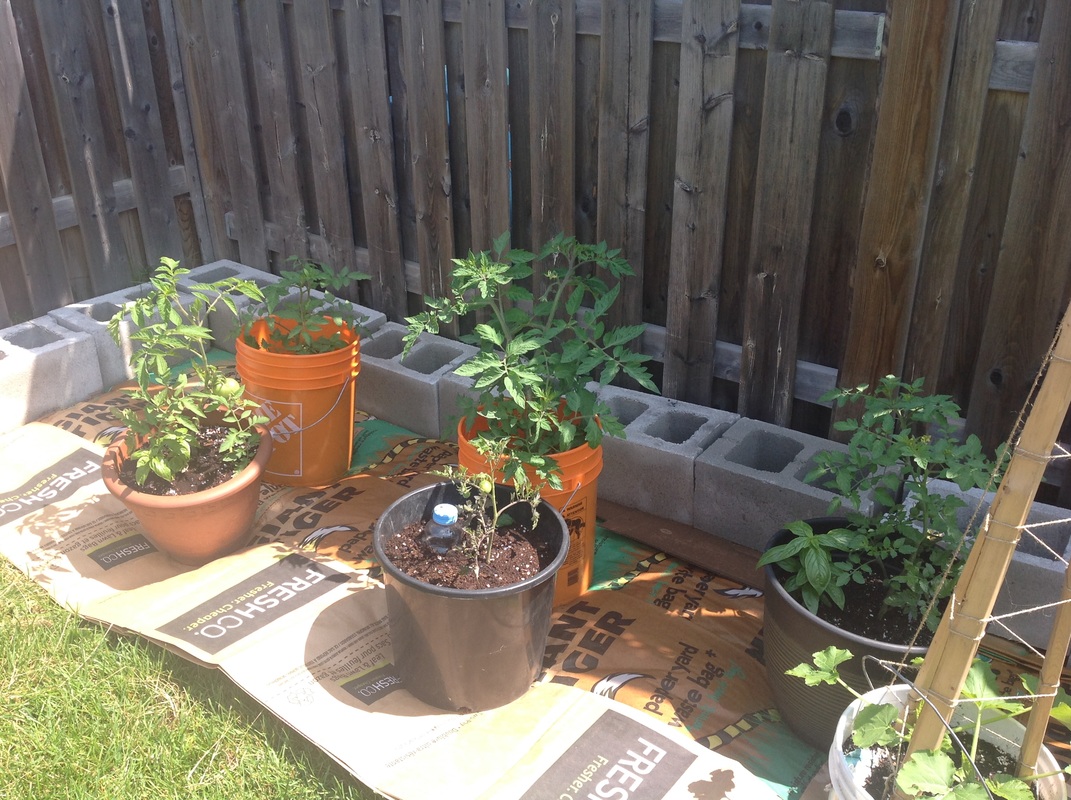
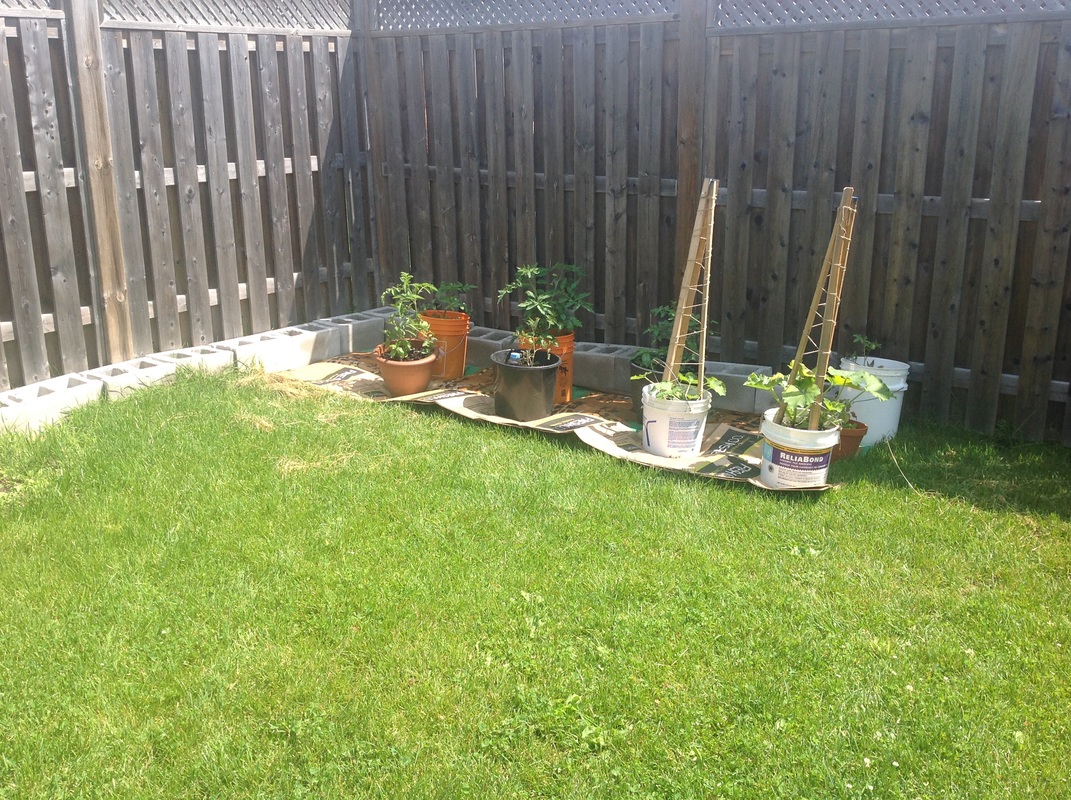
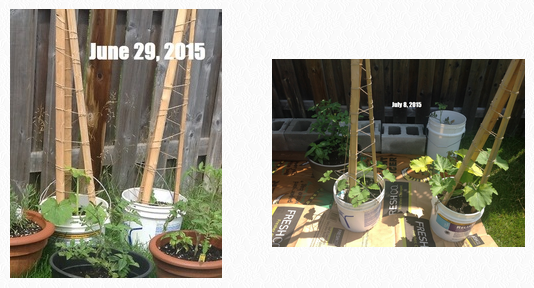
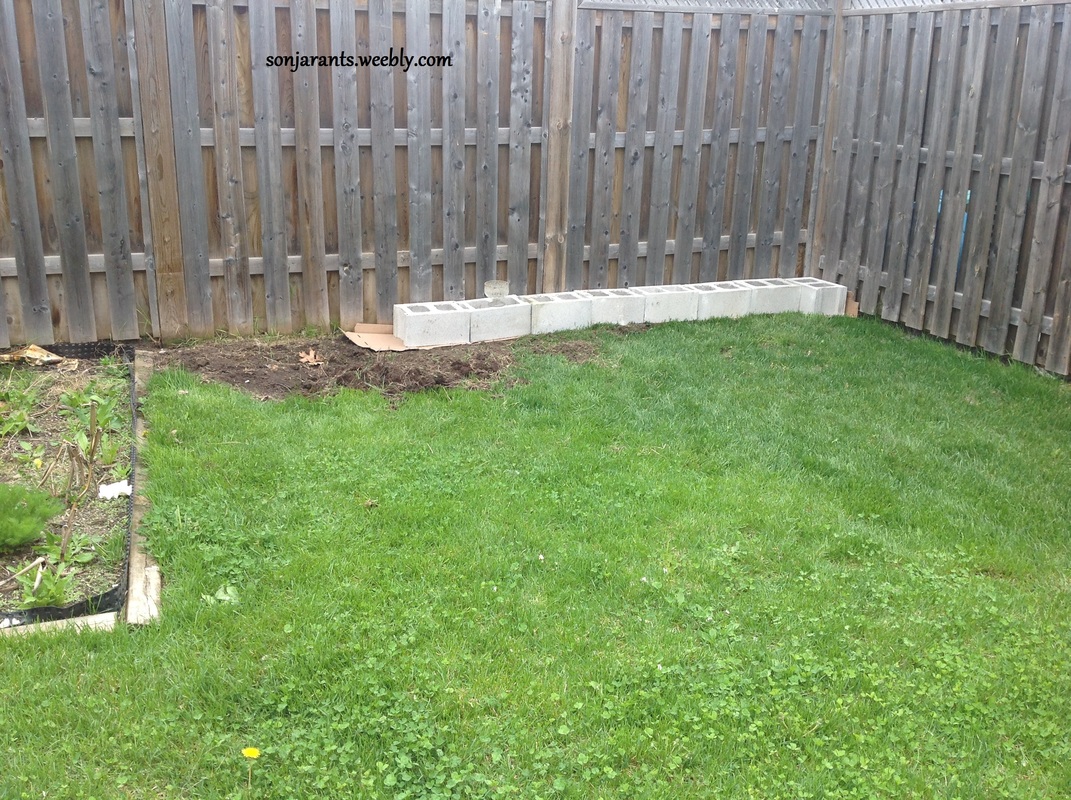
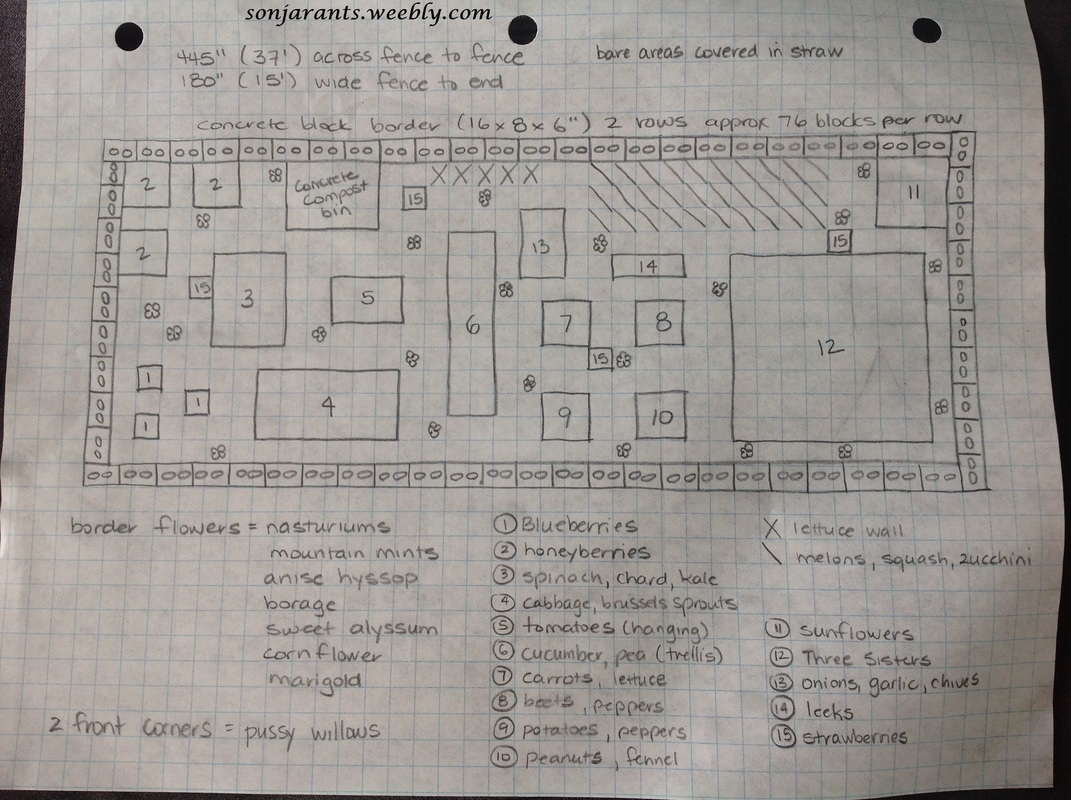
So here are some random pictures of the 'construction corner'. As you can see, everything is growing nicely. The blocks are very uneven, but I'll worry bout that when I put the second layer on next year. They'll sink a little during the spring thaw and I'm hoping to use mortar to level out the border.
Picture
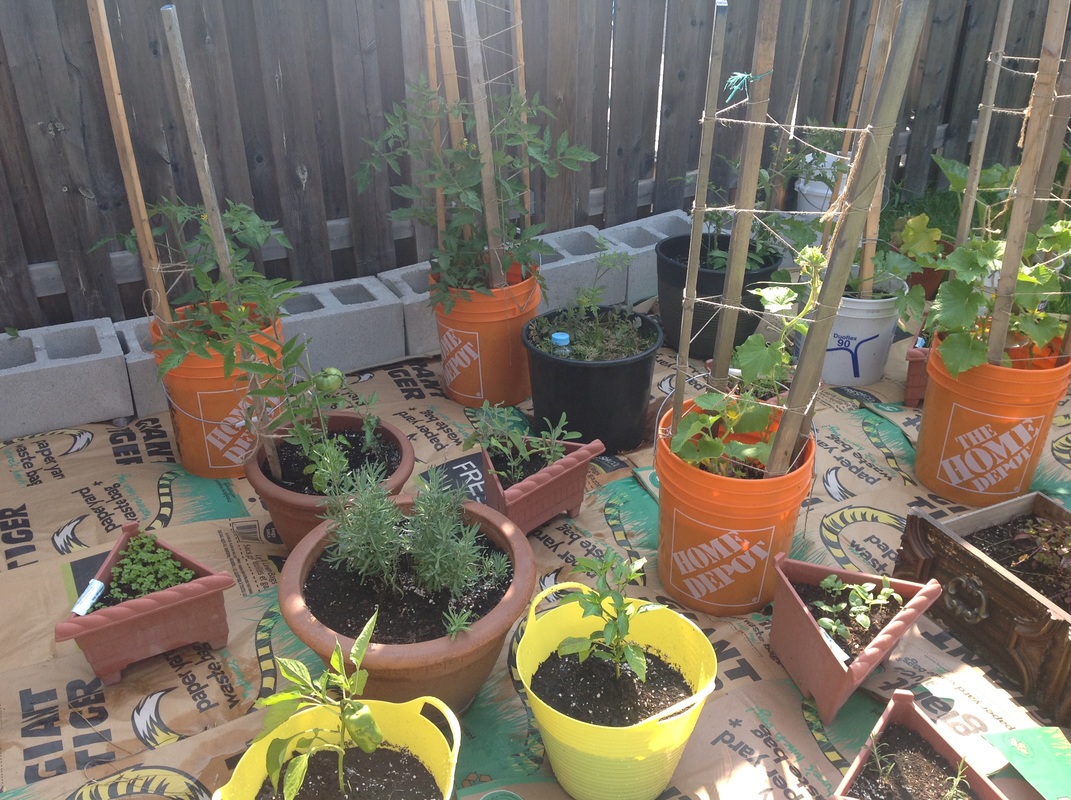
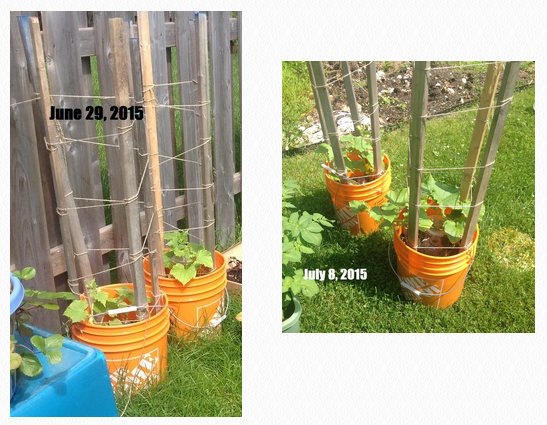
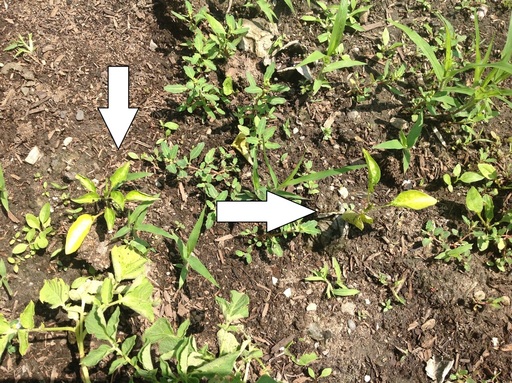
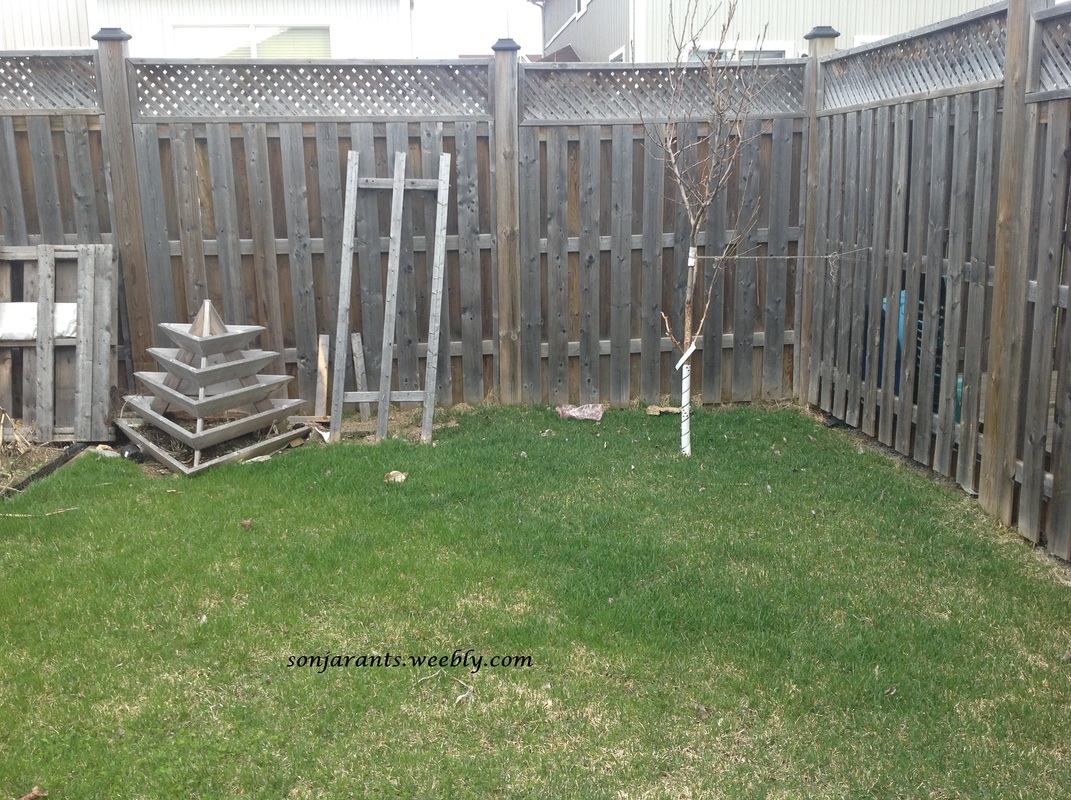
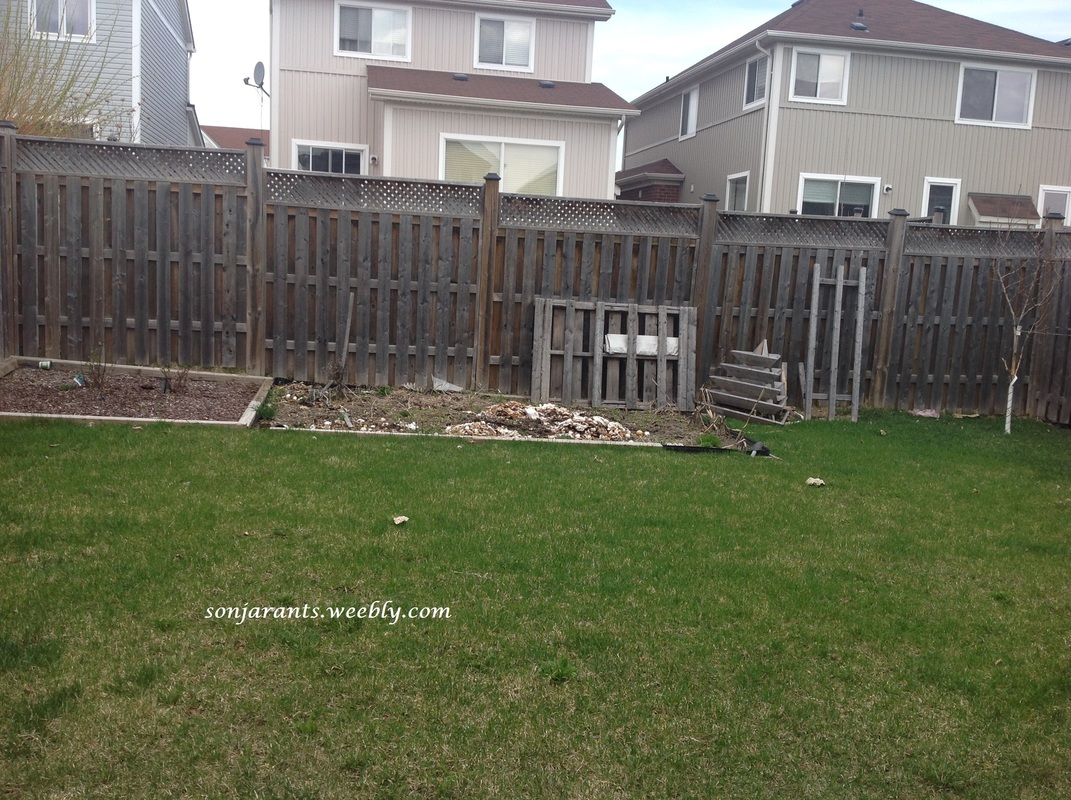
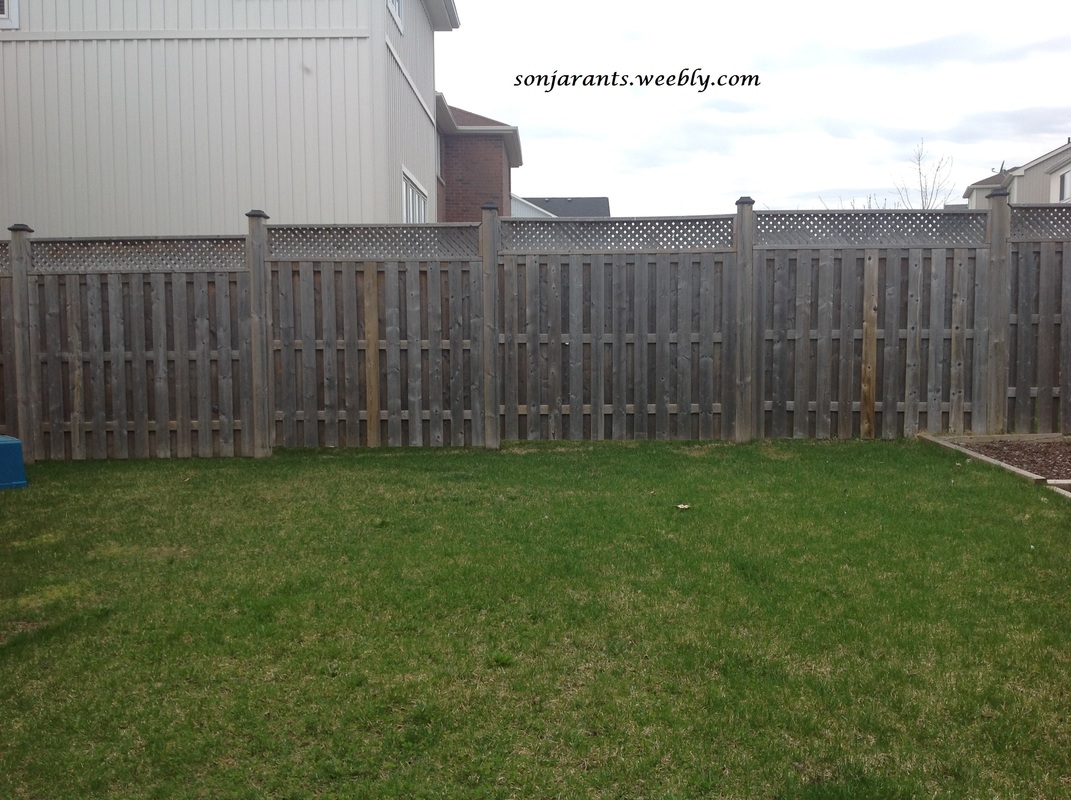
One other thing I've been noticing is how bloody uneven my entire yard is. I knew it was, but it's crazy ridiculous just how lumpy it is. See how the blocks are totally uneven at the back, and if you look at the carpet o' bags, you can see how lumpy it is. This whole project is a good thing in more ways than one. Once I get the border down and then cover the bags with straw, it'll help to level it out a little while it decomposes over the winter months. Next season when I start adding the raised beds and the soil, it will go even further to evening everything out.
Picture
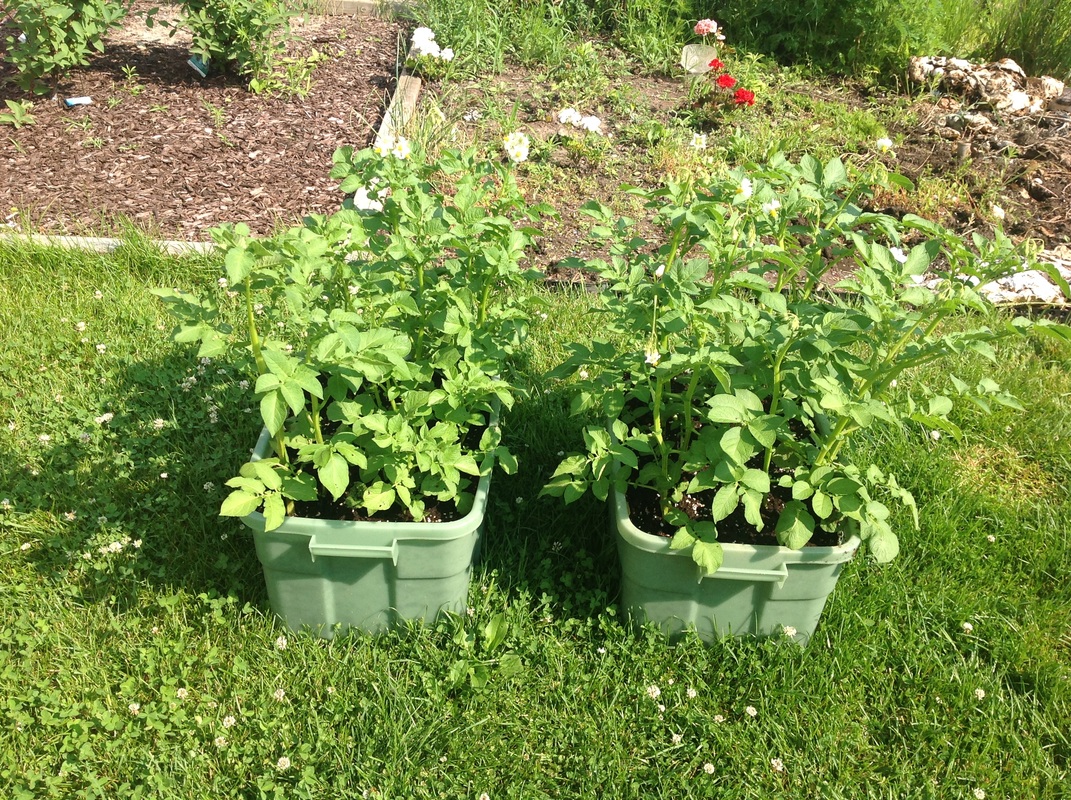
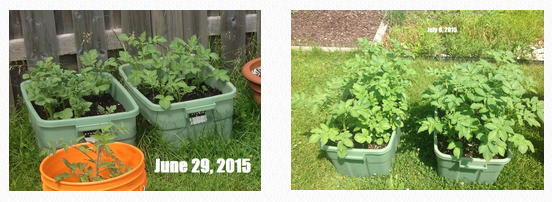
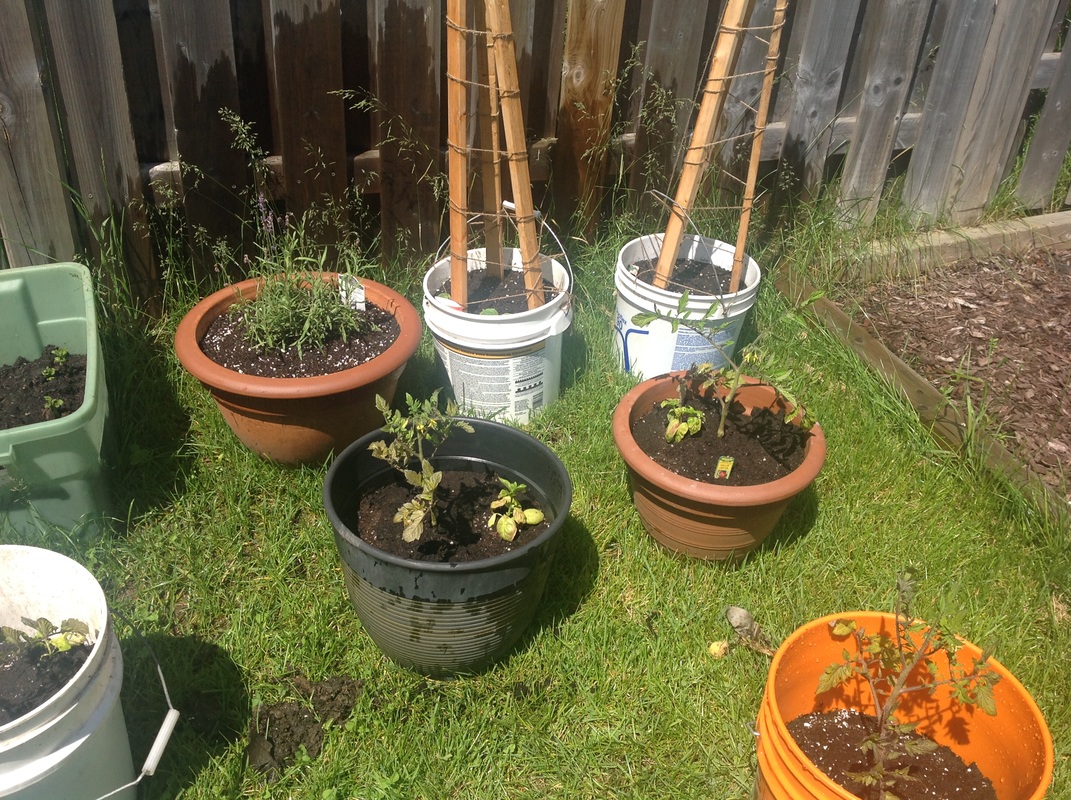
And as a parting shot I leave you with my potatoes, just because they're growing like crazy and they make me happy.
There's lots more to come. These pictures were all taken on July 13th, and since it's the first of August today you know I have more to show!
0 Comments

2015 Garden Makeover Update #3

7/20/2015

1 Comment

 
Picture
The garden makeover is coming along slowly. This time around I do actually have some pictures of the 'construction corner', as there has been a little progress.
Picture
Making the ground level is hard! So I decided I'll just plop them down this year (and probably into 2016), and then level as I do the second row on top, using the mortar to help me. I hope it works! I am ever the optimist when it comes to my little projects! You can also see the beginning of the grass and weed barrier I've begun. I had intended to use cardboard, but I just don't have a whole lot of large boxes, and it would be a nightmare to use regular and smallish ones. I know, I tried that a few years back and gave up right quick. As I was clearing away some weeds from the main patch, an idea occurred to me. Since the brown leaf bags are intended to decompose, why not use them as my barrier? So far, so good. They're nice and thick and I can still walk on them when they're wet, so I can access all my containers after a rain or while I'm watering. For now, my container garden is doing a great job of holding the edges down, but I'm running out, so pretty soon you'll see some makeshift weights... pretty much anything I can find in my garage that can be of use!
Picture
Here are some side-by-sides of my container garden, so we can get an idea of how well things can grow in containers. I did do some research on this before I started (when I realized that my actual garden was going to be useless to me this year), and found out that pretty much anything can be grown in a container, as long as you follow a few rules. I used potting soil, mixed with compost and topsoil. You can use just potting mix, but it's really expensive, which is why I opted to mix in the topsoil to get a little more bang for my buck. Picture one of my herbs was taken on June 29th, the sage (top left-hand corner) transplanted from cuttings I rooted indoors from some store bought organic sage. Next to that (clockwise), is Italian Parsley, Cilantro, Chamomile, Basil, and Dill, all from seed. Everything is growing relatively nicely except for the chamomile. It seems that herb hates me. I attempted to get some seedlings to grow while I was doing all the rest of my regular stuff back in March (tomatoes, peppers, squash, etc.), but not even one came up. I bought a couple of plants earlier and planted them with the strawberries, but I don't think they've grown a centimeter in the last two months. As you can see from these pictures, these seeds just are not co-operating. Maybe the whole pack is a bunch of duds, although that is highly unlikely.
The picture right beside it was taken on July 8th, and you can see the wonderful growth. Still no chamomile, though, so I decided to fill the void with some rosemary that I (finally!) got to root indoors. That's another plant I have a tough time with. According to Pinterest, it's super easy to propagate rosemary (and lavender) from cuttings. Nope, not so much. I had a whole lot of failure before these two finally took. You better believe I'm guarding these babies with my life! Oh, and the lavender? No success with that yet, although I am trying a different method right now. If it works, I'll let you know.
Picture
Potatoes are another plant that is supposedly super easy to grow in containers. In this case, I have to agree. As you can see from these pictures, they're growing like weeds! There are a few simple rules to follow, so I'll do a container gardening Hub for potatoes one day soon (after harvest, so I have the complete picture, start to finish, so stay tuned!
Picture
I didn't really have a good June picture of the zucchini. I'll be honest, it wasn't looking promising. The yellow (on the left) was kinda' growing, but the green was all small and sad with some deformed leaves. A couple of weeks later they're still not fantastic, but they're larger and flowering, so there may be hope yet for the zucchini (this time around the yellow is on the right).
Picture
Cucumbers. I don't remember what kind - I think one plant is straight and the other is the pickling kind. When I brought the seedlings home from the nursery, some of them died, so I couldn't remember which was which. I guess I'll know when I get fruit! In this case, you may notice a bottle inside one of the containers. I am trying an experiment for something that really piqued my interest. However, I think I may have used the wrong type of plant, because there seems to be no difference. I'll let you know what the experiment is, what I'll change next season, and what the results are at the end of the season.
Picture
Here are my sad, sad little pepper plants. Although it is a vast improvement over what they would have been had I left them in the ground. Remember this picture from last update?
Picture
So there's a little progress with the peppers, but I don't think I'll be bottling any home-grown roasted sweet peppers this season.
Picture
So here's a weird thing I did not notice until just this instant. I have no pictures specifically of my tomato plants! That is really strange, because they dominate my garden (every year), and I have a few different experiments going with them right now to find the best method, and yet, when I went to upload pictures of my tomatoes (saving the best for last, I thought), I didn't have any! So I cropped these from other pictures I have so you can see the growth. I will do a whole post on the experiments I'm running at the end of the season when I have my results.
So that's it for update #3. One of the things that have come out of this slow garden makeover progress is that I have time to try out some methods that I've read about, and this way I can see what works, what doesn't, and what I may want to incorporate into my new and improved gardening system. Stay tuned, I have more updates on the way!
Originally posted July 16, 2015 on sonjarants.weebly.com
1 Comment

2015 Garden Makeover Update #2

7/20/2015

0 Comments

 
Picture
You may be wondering if I've given up on the idea of my backyard overhaul because I haven't posted weekly updates as promised. Quite the contrary, I'm still totally into this project, the problem is that it requires a whole lot of money and time. The way my life seems to go is that I usually have only one of those at any given time - so progress is slow. I also had to take some time out to load up my container garden. Even though I cleared a patch in my garden, figuring I'd work around it, I don't think that we tilled the soil enough. Every seedling except for the brussels sprouts died, and the bunnies ate the sprouts. All the plants I brought home and stuck in the ground were still pretty much the same size two weeks later. My sweet peppers are still dwarves. So I moved as many plants as possible into containers to try to salvage at least some of the season. I pretty much let the rest of it go to weed. I'll pluck a brown bag or two every week, but I'm hoping to have the whole back of the yard covered in brown bags to get a fresh start next spring.
Picture
Note the sad, tiny pepper plants. Although the ones I moved are not too much bigger, they at least look alive. I didn't crop this photo at all, so you can see the scale next to grass.
Picture
Here are the transplanted peppers. Because I'm trying to get as much out of the ground as possible, I used some makeshift containers - an old dresser that is going to go to the trash heap soon, I may as well use the drawers for something right now. Transplanted my mint into another one.
Picture
Cucumbers, Chocolate & Citrus Mint, Lemon Balm, Potatoes.
So here's what I have so far (not too much, I'm afraid). I just did not have a whole lot of time to do any work because my shifts at work were incredibly insane. Now that I'm not working, I don't have a whole lot of money - everything we have has to be stretched a whole lot further than before, so I'll have to be a little more creative and work just a little slower, even though I actually have the time now.
Picture
Rear: Mint, Potatoes, Lavender. Front: Tomatoes.
I'll keep you posted. Not weekly as I had originally hoped, but I'll definitely keep you updated. I'll continue to post pics of my garden project, as well as my container veggies - let's see how well they do, how quickly they grow, and what food they bear.
Picture
Rear: Strawberries, Cucumbers, Mint. Center: Lemon Balm. Front: Peppers.
In the meantime, I've got some other projects underway (I may have ADD), and I'm happy to let you know how they pan out. I dug up one of the pitiful tomato plants that were left behind originally due to a shortage of containers and potting mix and am running a little experiment to see if my home brew of fertilizer can jolt it back to life.
Picture
Rear: Lavender, Yellow & Green Zucchini. Center & Front: Tomatoes.
And of course, I launched my new site dedicated to food, unusuallydelicious.weebly.com, where I post my recipes, trying to give you unusual if at all possible. I really wanted to focus on foraged food, but I found that those 'weeds' are most abundant in the spring, and I did not have too much time to go searching. I'll keep trying though. Oddly enough, the weed I was most looking forward to eating this season was purslane, and there's not even one in my weed patch (AKA my garden)! I found a couple of tiny plants in the front yard, but I sprayed them because they were right in front of the porch. I'll keep looking. Every year I have picked purslane from my garden all summer, so maybe I just need to have some patience.
Picture
Herb Garden (clockwise): Sage (grown inside from cuttings), Curly Parsley, Cilantro, Chamomile, Basil, Dill.
Unfortunately, the day I took these pictures (June 17, 2015), I neglected to take one of the "construction corner". Rest assured, it looked exactly the same at the last post (see it here), except for maybe some taller grass at the edges. I think hubby has given up on the edger this season... maybe he's not too impressed with the obstacle course I've set up in the yard this year.
Originally posted July 13, 2015 on sonjarants.weebly.com
0 Comments

2015 Garden Makeover Update #1

7/20/2015

0 Comments

 
Picture
A couple of weeks ago, I gave you the quick lowdown of my big plans for my 2015 backyard makeover. I know I said I would post each week, mostly promising that so that I would actually do what I plan and not let it fall to the wayside. Unfortunately, I was not able to actually do anything last weekend - I had both days off, no one coming over, nowhere to go, two glorious days with my garden - or so I thought. Sunday morning hubby and I head on over to Home Depot to pick up some more concrete blocks and as I pick up the third one my back goes "nope". I was almost in tears by the time I got home, the pain was agonizing. I was lucky, though, a couple of days (and nights) laying in an odd position on the couch, some medicated patches and a whole lot of Aleve and Robax, and I was okay by Wednesday.
So last weekend was a bust for me, and I had family over on Sunday, so I knew I had to do something today to get myself started. It was supposed to rain all day, so I got my butt in gear this morning and actually got a little bit done. Luckily no rain until just now (it's around 10:00pm as I write this), so I did get some work done and still managed to feed Marco when he came home for lunch, get some grocery shopping done, bake some donuts, do a load of laundry, and make dinner. All in all quite a productive day.
The picture above is what the corner looked like when I took my backyard pictures a couple of weeks ago. The tree is now gone. Hubby dug it up for me and it took about an hour leaning against the lamp post in front of the house with a "free" sign designed by my little guy before it found a new home. Hope it bears sweeter fruit for you than it did for me, whoever took it!
Picture
So here's my week one update. The tree is gone and I managed to get eight blocks down. This was harder than I had anticipated and this will definitely take longer than I thought. I may be forced to plant some of my seedlings into the middle of the existing bed just to make sure that they don't die on me.
I learned today that it is really, really difficult to level my backyard and also to get the bloody blocks to line up straight! Basically, I'm working with hand tools and a level, so it's tedious, but I'm setting the level, working the ground, then setting cardboard down to help keep the grass and weeds down and finally placing the block on top. There is no way in the world that I'm pulling up all that grass. First of all, that is a crazy amount of labor and secondly, what the heck am I going to do with it? I remember when we pulled up all the grass for the main plot, we must have set out thirty brown bags. You can't overload them, and the grass is so heavy, so they're only filled about a third. I didn't pull up the grass on the other side when I sectioned it off for the berry bushes either and it seems to be working out for me. I had set down landscaping mesh, covered with topsoil and then with mulch. There are some weeds and grass that pop up every now and then, but I've been pretty good about pulling them because they're so sparse, so it's really minor. I'm sure it will work on this side also.
So thanks for visiting and sit tight, I'll have another update for you next week, hopefully it will look a little more exciting!
Originally posted May 11, 2015 on sonjarants.weebly.com
0 Comments

My 2015 Garden Makeover

7/19/2015

0 Comments

 
Picture
Since I moved in to my home, as far back as the second year (it was a new development, so year one we only had a mud pit in the back), I have always had at least a small vegetable garden in my yard. Some years I am more diligent, while others, well the summer gets away from me and all I plant are a few tomatoes and harvest the mint, chives, squash and, potatoes that randomly grow when I don't take care of it. And no, the veggie fairy doesn't visit an plant random things while I sleep. Mint and chives will take over if you're not careful (I found this out the hard way), and since I throw my veggie scraps into a pile in the garden all year, which we spread around each spring, I will get potatoes, watermelon, pumpkin and other types of squash randomly growing in my yard. Those years when I'm just too busy to plant an orderly patch, these grow wild and I still get something from nature to eat.
This is one of the reasons I love my garden.
Picture
This year I have BIG plans for my yard. I have planned a whole makeover which will actually take me a few years to realize, but I decided that I'm going to take it slow, do things properly and hopefully within the next 5 years I will be reaping things like grapes and asparagus. I am not a patient woman, I like results right away, so it's actually something of an oxymoron that I find great pleasure in gardening and baking. Both hobbies require patience, consistency, and the following of known patterns. I'm not famous for any of those things, yet gardening, like baking, is one of the things that I love and that I look forward to each spring, especially after what feels like a never ending winter.
Picture
Since we just came out of one of those (in Mother Nature's defense, winter really started in January, but everyone here forgets that), I have spent the last few months dreaming, planning, drawing, buying, and seeding. I am so ready for the hard work, but I decided to post my progress weekly here for a couple of reasons - maybe you'll get some great info or idea to try out in your own yard and the most important reason... I can't give up if I'm posting my progress here. It will definitely motivate me to keep going!
Picture
So, on today's post I'll share my plan for the back portion of my yard and post pictures of what my yard looks like right now. Warning: it's not pretty! And no, the pictures above are not mine, they're actually from some great websites that I've been pinning information from to prepare for my project this summer. If you're interested in my planting pins, you can follow my two boards: My 2015 Backyard (pins with growing tips for fruit and vegetables I will grow in my actual yard) and Green-ish Thumb (pins with a wide variety of topics ranging from growing tips, beautiful indoor plants, hacks and just great articles about plants).
Picture
Here's my master plan for the actual vegetable plot. I know, you're blown away by my technical genius, but sometimes it's just easier to plot something out with a measuring tape, pencil and graph paper. The vegetable plot right now is about 25 feet by 10 feet, and this year I plan to enlarge it the entire length of the back fence, which is about 37 feet long and bring it down about 15 feet.
Picture
Since it is spring, you'll have to excuse the mess you see, but this is the view that is shown in the drawing above. This year I'm planning to take out the wood border, as you can see, I was too lazy to level it out and after a few years, the middle part is sinking quite a bit, the left side is one level, but the middle section is actually two. I already have plans to recycle that wood and depending how far I get with this main project, you may see what I plan with it later.
I'm going to border the whole area with concrete blocks. They're heavy enough that I won't have to worry about staking them into the ground, and I'm going to take the time to actually level them, starting from the right side. Just to let you know, I did not take this picture lop sided - my backyard is actually this slanted! The right side is pretty much a swamp most of the time, so that pear tree you see there is going to go away. Even though it bears fruit every year, it just gets way too much water so the pears taste like crap. I'll get one layer down this year to level out the back and then add another layer next year or even two years from now.
Picture
Here's a closer shot of the back left corner. This was where I had planned my herb garden (hence the pyramid) and grapevines. However, I never got around to the herb garden because I ran out of soil to put into the pyramid. It is a great idea and will be used this year, but holy crap does it require a lot of soil! A quick thanks to my mother in law, Mary, by the way, she was kind enough to get that for me for my birthday one year. Yes, I prefer practical gifts, and this definitely fits the bill! I decided against the grapes being here because as I did my research I found that grapes don't like growing in bogs, which is pretty much what this side of my yard is all summer. Raising the garden bed and leveling out the whole back will definitely fix this issue.
Instead of going step by step through my plans as I had intended to do, what I think I'll do is just re post each of these pictures as I accomplish something in that area. The area above will have sunflowers, three sisters, strawberries and some squash and/or melons. Yeah, I'm dreaming big this year!
Picture
This is a shot of the other corner. you can see the disaster of the wood border a little more closely this time. The back corner will be honeyberries (haskap), blueberries, strawberries, spinach, swiss chard and kale. The back will not be sectioned off in this manner, rather, I'm planning to have the different areas segregated into raised beds.
Picture
This general area will be my brand new compost bin. I have decided to build myself one instead of just throwing everything into a pile in the corner. Yes, I understand that the piles you see here are not in a corner, but that's because these piles are left over from our winter dumpings, where we pretty much just toss our full bin in the general vicinity of the garden. We can't actually see it because mother nature covers it in snow in the winter! Anyhow, I'm going to build one out of concrete blocks that will permanently sit here, or at least that's the plan.
Picture
So this is what 'll call the "right fence" side. This is where I'll plant my herb garden, blackberries, raspberries, and gooseberries. Not all in one big pile, but sectioned off. Here's a closer look at that pyramid, it'll be in this general area soon.
Picture
Picture
So this area is pretty much nothing right now. Maybe just a junkpile, or storage area. However, I have earmarked this corner for great things. Since asparagus has to be planted in a permanent area because you can't even start harvesting until the second year, I've decided to section off this area and plant me some sweet, sweet asparagus!
Picture
This is the picturesque back view of my house. Try to contain your envy. Anyhow, this year I'll build a rain barrel system which will attach to the downspout. Under the window on the right (where the hose is) I'm going to build a small gardening (or potting) bench. I'll probably get a tarp or something to cover it when it rains, but I haven't yet really planned out this side of the yard, I just have some ideas that I need to put into motion. The lilac bush will move to the front yard (where it will probably die like the other one, too much sun, I guess) and that whole section will be my medicinal herb garden. I've already started the plans on that one, and I'll post that at a later date once I have it complete.
Picture
Just a closer picture of the left corner of my house, the bench will eventually make it to the center of my yard, under the grape vines. That whole area will be the medicinal garden. It's well shaded, and coincidentally, most plants that are grown for medicinal purposes actually grow well in part-sun or shade, so this will definitely work. I may eventually add a step here, it depends on how the leveling of the yard works for me. Obviously a future project!
Picture
Last picture for today. We've come full circle and this is what I will call "left fence" side. along this fence, I am planning to try buckwheat this year and I'm also going to plant a "bunny garden" this year. I've been reading everything I can about keeping the bunnies from eating my veggies this year, and I decided that I don't want to do any of the actual deterrent ones like chillies or anything else that would hurt them. They're just looking for food, after all. So I stumbled upon an idea that made some sense to me: plant a decoy garden filled with all the stuff rabbits like to eat, and plant some flowers that they hate around the perimeter of your actual garden. I'll let you know if it actually works.
So there's the lowdown of my plans for the next few years. I hope that I can get it to actually look and work the way I see it in my head.
If you have any questions or comments, please feel free to leave them here.
Wish me luck!
Originally posted April 30, 2015 on sonjarants.weebly.com
0 Comments

    Author

    Another off-shoot of my sonjarants.weebly.com blog. This one will focus on gardening and all things green.

    Archives

    July 2015

    Categories

    All

    RSS Feed

Powered by
✕